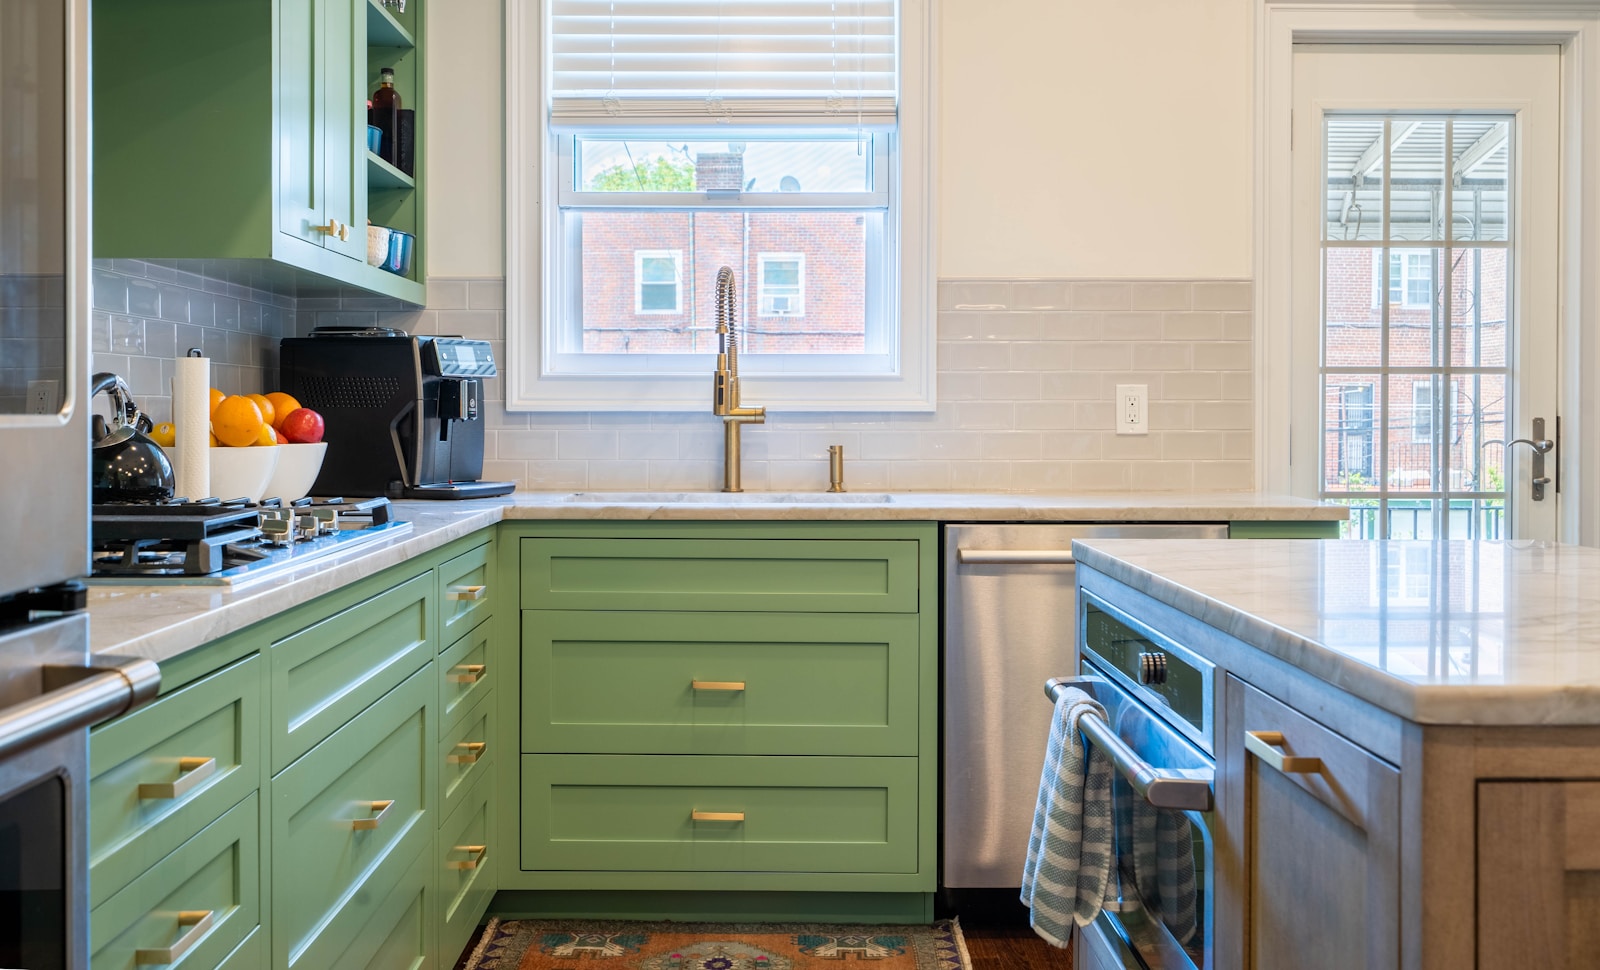
Tired of your old kitchen cabinets?
Don’t worry, you’re not alone. Many folks find themselves itching for a change, and a fresh coat of paint can make a world of difference. It’s a simple, cost-effective way to give your kitchen a brand new look without breaking the bank.
Should You Paint Your Cabinets Yourself or Hire a Pro?
Before you dive headfirst into your kitchen renovation project, it’s crucial to weigh your options. You can indeed grab a paintbrush and get started all on your own, or you could hand over the task to professionals.
Starting off, painting kitchen cabinets yourself is certainly a cost-saving measure. No labor costs involved and you could save a significant chunk of your budget. Do-it-yourself (DIY) projects can also be extremely rewarding. There’s a certain satisfaction in standing back and looking at the transformation you’ve achieved with your own two hands.
On the flip side, doing it yourself can be time-consuming. Juggling work, family and other commitments might leave little room for a DIY project. And let’s not forget the learning curve involved. Painting cabinets might not seem complex, but it does require some skill to get a smooth, even finish.
What about hiring professionals to do the job? Yes, their services would increase your overall expenditure, but remember: you’re not just paying for the act of painting. A professional painter comes with years of experience and knowledge on the best ways to prep, prime and paint your cabinets for a flawless finish. They can spot potential problems that you might overlook and suggest solutions.
You should also consider the convenience factor. With professionals, you won’t have to worry about sourcing materials, prepping your kitchen or even clearing up after the job is done. They handle it all.
Would you prefer the satisfaction of a job done by you or leaving it in the hands of experienced professionals? In the end, the decision boils down to your personal preferences, budget constraints, and available time.
Best Paint to Use for Kitchen Cabinets
Alright, let’s dive right in. When it comes to choosing paint for your kitchen cabinets, there’s no one-size-fits-all answer here. The type of paint you’ll choose depends on a lot of factors, including your individual taste and your kitchen’s style. Here, we’ll explore the most popular options to help you make the best choice.
Oil-based Paints
First off, we’ve got oil-based paints. These paints offer a smooth, glossy finish and excellent durability. They’re perfect if you’re after a shiny, almost lacquered look. Plus, they’re a great option if your cabinets are in high traffic areas or exposed to a lot of wear and tear.
However, keep in mind, they can yellow over time and they have a stronger odor than other types. You’ll also need mineral spirits for clean-up.
Water-Based Paints
Next up, there’re water-based paints. These are easier to work with and dry much faster than their oil-based counterparts. They also have less of an odor and fewer VOCs (volatile organic compounds). Plus, water’s all you need for clean-up.
While these paints are available in a wide range of colors and finishes, they might not be as durable as oil-based paints.
Acrylic-Based Paints
Finally, acrylic-based paints, or latex paints, combine the best elements of both oil and water-based paints. These paints are highly durable, clean up with water, and resist yellowing. They also dry quickly and emit less odor than oil-based ones.
While these are all great options, remember, achieving professional results requires proper preparation. So before painting, ensure your cabinets are clean, dry, and sanded to ensure proper paint adhesion.
Tools and Materials You’ll Need
So, you’ve decided on the type of paint for your kitchen cabinets. That’s great! Now let’s run through the tools and materials you’ll likely need for this DIY project.
- Paintbrushes and Rollers: For a smooth application, invest in good quality paintbrushes and rollers. A combination of wide and narrow brushes would be handy, the wider brushes for broad surfaces and the narrow ones for the nooks and crannies.
- Primer: No matter the type of paint you chose, a good primer is key. It helps in creating a smooth, uniform surface over which paints can adhere properly.
- Sandpaper: A fine-grit sandpaper is crucial in the prep stage. It’ll help you smooth down any rough spots, ensuring an even surface for paint application.
- Cleaner/Degreaser: Kitchen cabinets can get quite greasy. A good cleaner or degreaser will eliminate all that grime, ensuring nothing interferes with your paint’s adhesion.
- Painter’s Tape: You’ll need this to protect your walls and countertops from accidental splashes.
After assembling all these tools, it’s essential to get the right paint for the job. Whether oil-based, water-based, or acrylic, remember that each type has its pros and cons. Oil-based paints give that glossy finish and top-level durability. But be prepared; they may yellow with time.
Water-based paints, on the other hand, dry faster and are less smelly—an absolute win if you’re doing a quick touch-up. But brace yourself for a less durable finish.
Lastly, we have the acrylic-based paints—a beautiful fusion of oil and water-based paints. Their selling point? Durability, easy clean-up process, and resistance to yellowing.
Whichever paint you decide to use, preparation remains key. As the saying goes, ‘A workman is only as good as his tools.’ With the right tools and materials, your dream of having vibrant, beautiful kitchen cabinets is just around the corner. Prepare well, take your time, and wait for the results to speak for themselves. You won’t only be amazed at your painting prowess, but you’ll appreciate the stunning transformation effected on your kitchen cabinets.
Painting Kitchen Cabinets in 7 Steps
Time to get down to business! Let’s paint those kitchen cabinets in seven easy, achievable steps.
1. Gather All Your Supplies
Before you can get started, you’ll need to make sure you’ve got all your supplies on hand. That means paintbrushes, rollers, primer, sandpaper, cleaner/degreaser, and painter’s tape. Remember, using the right tools and materials is key to achieving a professional look. It may seem like a lot, but it’ll be worth it in the end – trust me!
2. Remove Cabinet Hardware
Now it’s time to remove all the cabinet hardware. This includes hinges, knobs, and drawer slides. By doing so, we’ll ensure a smooth and consistent paint job, removing the risk of accidentally splashing paint on a mirror or on your shiny hardware.
3. Clean Your Cabinets
Third step is all about cleaning. Use a dedicated cleaner/degreaser to thoroughly clean all the surfaces you plan to paint. You might be surprised at how much grime and dirt can build up on your cabinets over time. By thoroughly cleaning them, you’re ensuring the paint will stick properly.
4. Repair Any Holes or Scuffs
Next, it’s time to look over your cabinets for any holes, scuffs or damage. You can use wood putty or filler to repair these imperfections. If you miss this step, your paint job may highlight these issues instead of covering them up.
5. Sand the Cabinets
Now comes the part we’ve all been waiting for – sanding. Before you start, remember it’s not about removing the previous finish completely, just roughing up the surface to help the new paint adhere.
6. Apply a Layer of Primer
Once you have a nice, smooth surface, apply a layer of primer. This is a vital step. A layer of primer will help your paint bond with the wood and provide a smoother finish. This step may seem tedious, but it’s super essential and will pay off in the end!
7. Start Painting!
Finally, the moment you’ve been preparing for – painting. Whether you chose oil-based, water-based, or acrylic-based paint, it’s now time to bring new life to your cabinets. Apply the paint evenly and avoid any drips or excess. Remember, steady hand and patience are your best friends in this final phase. Stick to these, and you’ll soon have kitchen cabinets to be proud of.
Enjoy Your Updated Kitchen!
So, you’ve tackled the task of painting your kitchen cabinets head-on. You’ve seen the importance of prepping right, taking your time, and paying attention to the small details. You’ve put in the elbow grease and now it’s time to step back and admire your handiwork.
Doesn’t it feel great to see your kitchen transformed? You’ve given your space a fresh, new look without breaking the bank. And the best part? You did it all by yourself.
Remember, it’s all about the journey and not just the destination. The skills you’ve picked up along the way? They’re yours to keep. So, here’s to more DIY adventures in your future. For now, though, kick back, relax, and enjoy your updated kitchen. You’ve earned it!